Clean water has become one of those “small” home upgrades that quietly changes everything: your morning coffee tastes better, your shower doesn’t smell like a pool, and your appliances stop collecting mystery grit. But the moment you go from shopping to actually doing the plumbing installation, reality hits: your house isn’t a product page. You’ve got real pipes, real water pressure, and real consequences if a fitting isn’t seated right.
What makes water filtration feel confusing is that the market has exploded with options—pitchers, faucet mounts, under-sink kits, and full-on whole-house setups that look like they belong in a mechanical room at a brewery. And yeah, the global demand is booming (industry forecasts put the water filter market climbing from roughly $48B in 2025 toward the $80B+ range in the early 2030s), which is great for choice… but not great for decision fatigue. The good news: once you match the right filter types to your home and your skill level, the actual water filter setup becomes a pretty logical sequence of shutoffs, pipe connections, slow re-pressurizing, and obsessive leak detection.
En bref
- 🧭 Choose filter types based on your water problems (sediment, chlorine, lead, odors) and your comfort with cutting pipe.
- 🧰 Prep matters: the right plumbing tools, towels, a bucket, and working shutoff valves prevent panic later.
- 🚰 Under-sink water filtration is the “sweet spot” DIY for taste and targeted contaminants—manageable but still real plumbing.
- 🏠 Whole-house systems treat every tap, but demand careful planning around water pressure, bypass valves, and code-friendly installation.
- 🕵️ Re-pressurize slowly and use the paper towel method for leak detection—tiny drips become expensive surprises.
- 🔁 Plan for system maintenance and filter cartridge replacement from day one (clearance, dates, spare cartridges).
Choosing water filtration systems for plumbing installation: match the system to your home
Let’s follow a simple thread through this whole article: a fictional homeowner named Maya. She’s not trying to become a master plumber; she just wants water that doesn’t taste like chlorine and doesn’t leave white crust on everything. Her first mistake would be buying the “biggest” system without knowing what’s in her water or how her plumbing is laid out. The smarter move is to choose based on three things: water quality, installation complexity, and ongoing system maintenance.
Start with water testing. For municipal water, a decent home test kit can flag chlorine, hardness, and sometimes lead indicators. For well water—or if you suspect iron, arsenic, or bacteria—send a sample to a certified lab so you’re not guessing. This isn’t “overkill”; it’s how you avoid buying a carbon filter when your real enemy is sediment, or installing a fancy media cartridge that clogs in a month because you skipped a pre-filter.
Now think about where filtration belongs in the plumbing. A whole-house unit typically sits on the main line after the pressure regulator (if you have one) and before the water heater and branch lines. Under-sink systems usually go on the cold line feeding a dedicated drinking faucet (and sometimes the fridge line). Faucet mounts and countertop systems stay out of the pipework entirely—which is why renters love them.
Filter types and real-life fit: renters, homeowners, and “I hate surprises” people
Maya owns her house, so she has freedom. But freedom comes with responsibility: she can cut into plumbing, but she also owns the cabinet damage if she doesn’t. If you rent, you’re usually better off with faucet-mounted or countertop options—no drilling, no permanent pipe connections, minimal drama with a landlord.
If you own and want “better drinking water,” an under-sink unit is often the best balance. You get high performance without touching the main line. If you want better showers, better laundry, less sediment beating up your water heater, that’s when a whole-house system earns its keep.
Installation difficulty vs. maintenance reality (the part people forget)
Here’s the truth nobody puts on the box: the “hard part” isn’t always the install—it’s filter cartridge replacement when you’re tired, it’s winter, and the housing is wedged behind a shelf. When you choose a system, plan for clearance (often 18–24 inches below housings on whole-house units), and plan for how often you’ll actually keep up with cartridge swaps.
To make it concrete: Maya almost bought a dual 20-inch whole-house setup for “maximum protection,” then realized it would sit in a tight utility closet where you’d have to do yoga to remove a housing. She chose a better location and added a bypass loop in the plan. That decision alone can save you from future rage.
| Filter type 🧩 | Typical plumbing installation level 🛠️ | Best use case 🎯 | Watch-outs ⚠️ |
|---|---|---|---|
| Pitcher / dispenser 🥤 | Very easy (no plumbing) | Basic taste/odor improvement | Small capacity; frequent refills |
| Faucet-mounted 🚰 | Easy (threads/adapter) | Renters; quick upgrade | Not for all faucet styles; can reduce flow |
| Under-sink 🎯 | Moderate (tee/valve + tubing) | Targeted drinking water filtration | Needs space; careful leak detection |
| Whole-house 🏠 | Difficult (cut main line + bypass) | Protect plumbing + treat every tap | Water pressure planning; code/permits |
The next step is getting your workspace and plumbing tools lined up so you’re not improvising with a butter knife and regret.
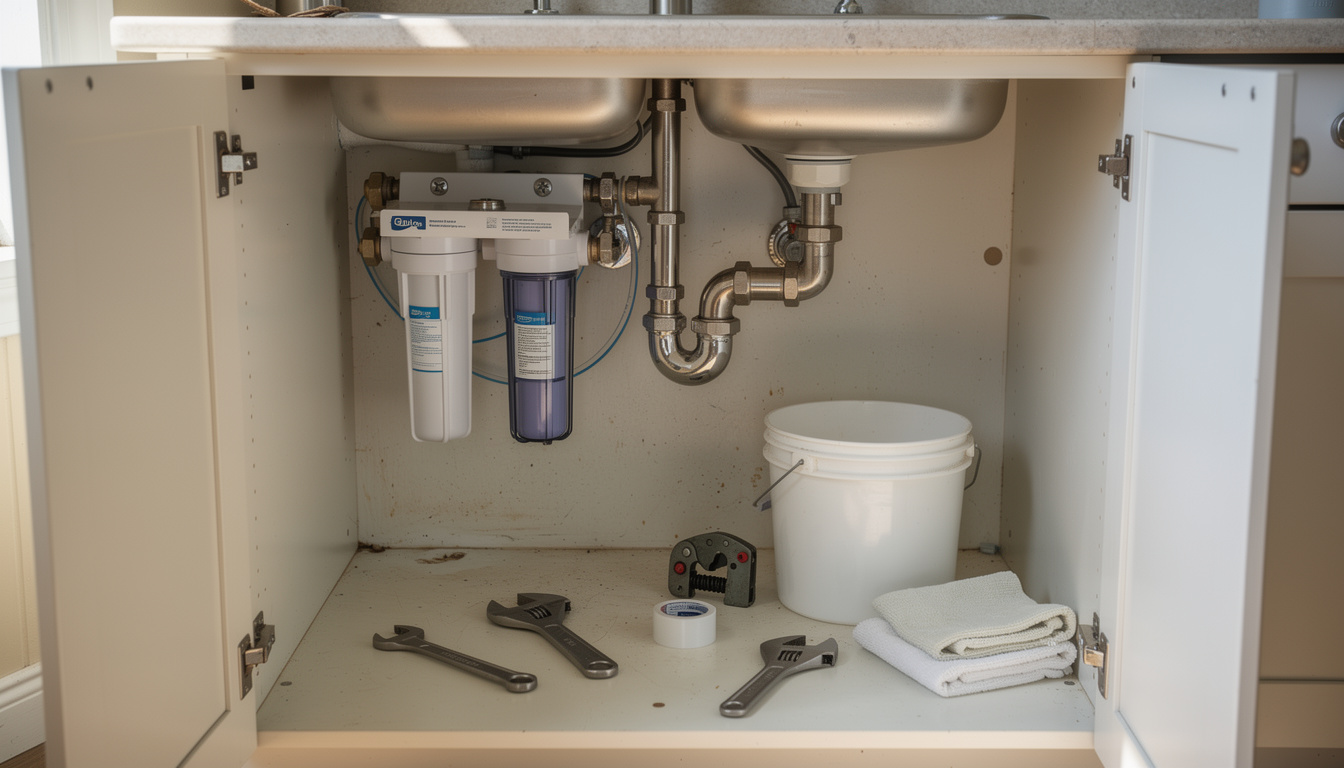
Plumbing tools and pre-install checklist for a clean water filter setup
Maya’s neighbor once tried to install an under-sink filter with one wrench. The shutoff valve body turned, the line twisted, and he created a slow leak that only showed up after dinner. That’s the pattern: most failures happen because the prep was sloppy, not because the person was “bad at plumbing.” If you want a calm job, treat prep like half the project.
Core plumbing tools you’ll actually use (and why they matter)
Keep it simple and practical. For under-sink and many whole-house installs, these items cover the majority of pipe connections and adjustments:
- 🔧 Two adjustable wrenches (one to hold the fitting steady, one to tighten—this prevents twisting other joints).
- 🧵 Teflon tape for threaded connections (wrap in the direction of the threads so it doesn’t bunch up).
- ✂️ Tubing cutter (or a sharp utility knife) for clean, square cuts on plastic tubing.
- 🪣 Bucket + 🧻 towels (because “the line is drained” is never 100% true).
- 🔦 Headlamp (under-sink lighting is a joke; a headlamp makes you faster and safer).
For whole-house filtration, add a pipe cutter or hacksaw (matched to your pipe material), a level, drill/bits for mounting brackets, and potentially a deburring tool for copper. Those burrs are tiny, but they can wreck seals or restrict flow.
Workspace setup and shutoff validation (yes, validate it)
Empty the cabinet or clear the utility room area. You need room to work and room to see. Maya learned this the easy way: she laid towels down before doing anything else, which saved her cabinet base when a tablespoon of water became a cup during disassembly.
Now the big one: find and test the shutoff valves before you disconnect anything. Turn the cold valve under the sink and confirm the faucet stops flowing. If that valve is seized or fails to fully close, you’ll need to use the home’s main shutoff (or replace the valve). Don’t “hope” it works—hope is not a plumbing strategy.
Planning for water pressure and flow (so your shower doesn’t cry later)
Water pressure isn’t just comfort; it’s how well your system behaves. Whole-house filters are usually rated by flow (GPM). Many homes do fine with 15–20 GPM for a 3–4 bedroom setup, while larger homes with multiple showers running at once may need higher flow housings or parallel setups. Undersizing shows up as pressure drop at peak demand—exactly when you’re trying to rinse shampoo.
If you’re adding gauges, put one before and one after filtration. New filters might only drop a few PSI, but as cartridges load up, the drop increases. A common “time to change” flag is a pressure drop approaching roughly 15 PSI across the filter set, depending on your system design.
Next up: the classic DIY win—an under-sink install that’s neat, serviceable, and doesn’t drip a week later.
If you want to watch a couple real installs before you touch anything, it helps to see the sequence in motion.
Under-sink water filtration plumbing installation: tee fittings, tubing, and a dedicated faucet
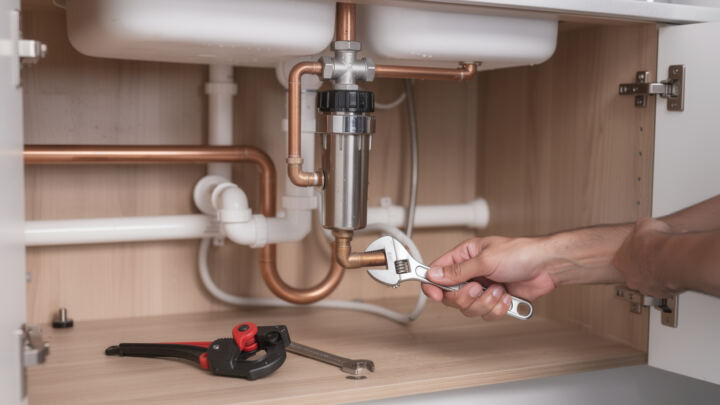
Under-sink water filtration is popular for a reason: you get a serious upgrade in taste and contaminant reduction without cutting the main line. Maya’s goal was straightforward—filtered water for drinking and cooking—so an under-sink kit with a dedicated faucet made the most sense. The trick is to move methodically: shut off, drain, split the cold supply, mount, connect tubing, then re-pressurize slowly.
Shut off, drain, and install the tee (adapter) without cracking anything
Turn the cold shutoff valve clockwise until it stops. Open the kitchen faucet to drain pressure and clear the line. This step prevents that nasty “surprise spray” when you loosen the supply line.
Disconnect the flexible cold water line from the shutoff valve. Install the tee fitting (adapter) onto the shutoff valve, using Teflon tape on threaded connections where appropriate. Then reconnect the original faucet line to the tee’s top port, and use the tee’s side port to feed your filter.
Key detail: tighten compression fittings to “snug-plus-a-little,” not “destroy it.” Over-tightening can deform washers or crack plastic parts, creating the slow drip that drives people insane.
Mounting the system so filter cartridge replacement isn’t miserable
Pick a cabinet wall location where you can access the housing later. Don’t mount it behind the trash can and call it a day. Mark holes, drill pilot holes, and secure the bracket. If the kit includes a housing wrench, store it nearby immediately—future-you will thank you.
For the faucet: check for an existing capped hole (old sprayer, soap dispenser). If you must drill, tape the area so the bit doesn’t skate. Drill a small pilot hole first, then use the correct bit or hole saw for your sink/counter material. Rushing here is how countertops get expensive.
Tubing and push-to-connect fittings: the square-cut rule
Most under-sink kits use 1/4-inch tubing with push-to-connect fittings. These fittings are great, but they’re picky: the tubing end must be clean and square. Use a tubing cutter for best results. Push tubing in until it bottoms out, then tug lightly to confirm it’s locked.
Maya labeled her lines with small tags (inlet/outlet) before final routing. It sounds nerdy, but it prevents silly mistakes during system maintenance or when you add a fridge line later.
Optional upgrade: feed the refrigerator with the same filtered line
If your under-sink system has enough flow, you can split the filtered outlet to supply the fridge/ice maker. Use a tee after the filter (on the filtered side) and run tubing to the fridge connection. The payoff is nice: better ice, better dispenser water, and you can often skip pricey brand-specific fridge cartridges—just keep an eye on pressure and flow.
Next, let’s zoom out: when the goal is to protect showers, laundry, fixtures, and the water heater, a whole-house approach changes the game.
Want a visual walkthrough focused on whole-house plumbing layout and bypass valves? This query pulls solid step-by-step examples.
Whole-house water filtration systems with plumbing: location, bypass valves, and pressure-safe pipe connections
A whole-house setup is the heavyweight option: it treats all incoming water, cuts odors, reduces sediment damage, and helps protect appliances. It also raises the stakes. When Maya helped her brother install one, they planned like it was a mini construction job: locate the main, map the cut, mount securely, and add isolation valves so future filter cartridge replacement doesn’t require shutting down the entire house.
Best placement on the main line (and why “after the heater” is a miss)
Install on the main water line after the pressure regulator (if present) but before the water heater and branch lines. Putting filtration after the heater means the heater still eats sediment, and you lose one of the biggest benefits: protecting the tank and extending its life. For many homes, basements, utility rooms, and crawl spaces near the entry point make the most sense—ideally near a drain or laundry sink for easier servicing.
Clearance matters. Many housings need roughly 18–24 inches below them to drop a cartridge out. If you mount too low or under a beam, you can end up unable to service it without redoing the bracket.
Bypass valves and shutoffs: the quality-of-life feature you’ll never regret
Install shutoff valves on both inlet and outlet sides of the filter head, plus a bypass loop. This does three useful things:
- 🔁 Lets you change cartridges without shutting water to the whole house.
- 🧯 Gives you an emergency bypass if a housing cracks or you discover a leak mid-weekend.
- 🧪 Makes troubleshooting easier because you can compare filtered vs. bypass behavior.
This is also where local code can matter—some jurisdictions require accessible shutoffs and, depending on configuration, backflow prevention considerations. If permits are required for main-line modifications where you live, follow that rule; it’s cheaper than a failed inspection later.
Cutting and connecting: copper, PEX, galvanized, and “measure twice” reality
Turn off the main shutoff, then open the lowest faucet in the home to drain and relieve pressure. Mark cut points carefully, accounting for the filter head length, fittings, and any unions. Cutting is irreversible, so dry-fit your components before you commit.
Copper: use a tubing cutter and deburr the ends. PEX: use proper PEX cutters and fittings rated for potable systems. Galvanized: typically needs a hacksaw and threading considerations; this is one of the scenarios where calling a pro is often the smarter play because a bad connection can become chronic seepage.
When threading into plastic filter heads, don’t overtighten. A cracked housing can cause catastrophic flooding. Hand-tight plus a controlled additional turn is usually enough, and the system’s plastic wrench is there for a reason.
Flow rate and water pressure: sizing so the house still feels normal
Most residential systems fall in the 10–25 GPM range. If you undersize, you’ll feel it during peak demand—two showers and a dishwasher can make the upstairs shower weak and miserable. Some pressure drop is normal; what’s not normal is a house that suddenly feels like it’s on a trickle system.
Maya’s brother added a simple pressure gauge after the filters. That one little dial turned maintenance from guesswork into a habit: if the pressure drop creeps up, the cartridges are loading. It’s an easy “dashboard” for system maintenance.
Next comes the moment of truth for any plumbing installation: pressurizing the system and proving it’s dry.
Leak detection, safe pressurizing, and system maintenance after water filter setup
This is the part that separates “installed” from “installed well.” When you reintroduce water, don’t slam valves open like you’re starting a lawn mower. Open slowly. Let housings fill and air purge without shocking the fittings. Maya learned this from a plumber friend who swears most call-backs are caused by rushing the last 10 minutes.
Slow pressurizing: listen, watch, then wipe
Crack the valve slightly and listen. A hiss, spray, or sudden rushing sound near a joint is a red flag. If anything looks wrong, shut it down immediately and fix it before going further.
Then do the “paper towel test.” Wipe every joint you touched with a dry paper towel and inspect for moisture. This catches micro-seeps that your eyes miss—exactly the kind that warp cabinets and grow mold over time.
Common drip fixes (without going full Hulk)
If a threaded connection seeps, don’t just crank harder. Shut off the water, depressurize, disassemble, re-wrap with fresh Teflon tape, and re-tighten properly. For compression fittings, a small additional turn is often enough, but only after verifying the ferrule is seated correctly.
If you have push-to-connect fittings and see moisture, pull the tubing out (using the release collar), re-cut the end perfectly square, and reinsert fully. Most “mystery leaks” in these systems come from angled cuts or tubing that wasn’t pushed to the stop.
Flush new filters and set a replacement routine you’ll actually follow
Carbon filters often release harmless carbon fines at first. Flush the system for several minutes (often 5–10 minutes depending on the unit) until water runs clear. Don’t use the first batch for drinking or cooking.
Now lock in a maintenance rhythm. Write the install date on the housing with a marker or keep a small log nearby. In many homes, sediment cartridges get swapped every 3–6 months, and carbon cartridges every 6–12 months—shorter if your water is dirty or your household is busy. The real indicator is performance: returning taste/odor, falling flow, or rising pressure drop. That’s your system talking to you.
When you treat maintenance like a normal home chore instead of an emergency, your filtration stays effective and your plumbing stays safer—simple as that.
How do I know which filter types I actually need?
Start with a water test. Sediment filters handle particles (sand/rust), carbon targets chlorine and odors, and specialty media targets specific issues like iron or arsenic. Match the filter to your results and install location so you’re not overbuying—or missing the real problem.
My water pressure dropped after installation—what should I check first?
Check valve positions (including bypass valves), confirm tubing isn’t kinked, and verify you didn’t undersize the system’s GPM rating for your peak demand. If you have gauges, compare pre/post readings; a growing pressure drop often points to clogged cartridges that need filter cartridge replacement.
What’s the fastest way to do leak detection after a water filter setup?
Pressurize slowly, then wipe every connection with a dry paper towel. Even tiny seepage shows instantly. If you see moisture, shut off water, depressurize, and fix the specific fitting (re-tape threads, re-seat compression fittings, or re-cut tubing ends square for push-to-connect joints).
Do I really need bypass valves on a whole-house system?
If you can add them, yes. A bypass loop makes system maintenance and cartridge changes easier, allows emergency operation if the filter housing leaks, and helps troubleshooting by comparing filtered vs. bypass flow. It’s one of the highest-value upgrades in a whole-house plumbing installation.
How often should I sanitize housings during filter cartridge replacement?
A quick cleaning is smart whenever you open housings: rinse with mild soap and water, and if your manufacturer allows it, sanitize with a small amount of unscented bleach solution, then rinse thoroughly. It helps prevent biofilm buildup and keeps the system performing like it should.