It usually starts with something you could almost ignore: a water bill that jumps for no reason, a “random” warm patch on tile, or that stubborn musty smell you swear you cleaned last weekend. Then the questions kick in. Is it just a running toilet… or is it a slab leak quietly pouring water under your concrete foundation? The tricky part is that under-slab plumbing problems don’t show up like a classic under-sink drip. They show up sideways—through floor moisture, warped materials, hairline cracks, and sometimes a legit water pressure drop that makes showers feel weak and sad.
This is where home leak detection becomes less of a “nice-to-have” and more like basic home survival. Because once water starts moving where it shouldn’t, you’re not just risking a bigger bill—you’re inviting water damage, mold, and even a foundation leak scenario that can mess with doors, walls, and flooring. The good news: you can do several smart checks before anyone touches a jackhammer. The even better news: if it is under the slab, modern leak detection tools can often pinpoint the problem without turning your living room into a demolition site.
En bref
- 💸 A sudden bill spike + unexplained dampness often points to a hidden slab leak, not “just higher rates.”
- 👂 If you hear hissing or running water when everything’s off, treat it like a real clue, not background noise.
- 🧊🔥 Warm spots on tile (or oddly cool damp zones) can map where water is traveling under the slab.
- 🧪 A simple water meter test overnight is one of the fastest DIY ways to confirm a likely leak.
- 🧰 Pros use acoustic sensors, pressure testing, infrared, and tracer methods—aka leak detection tools that reduce guesswork.
- 🛠️ Repair paths include spot pipe repair, rerouting/repiping, and trenchless options; the “best” one depends on risk + disruption.
- 📸 Document everything early for insurance and for a smoother plumbing inspection.
Slab Leak Basics: What’s Happening Under Your Home (and Why It Escalates Fast)
A slab leak is exactly what it sounds like: a leak in water lines that run inside or beneath the concrete slab foundation. What makes it different from a normal leak is the location. You can’t just open a cabinet and see it. Instead, the water spreads through soil, gravel base layers, and tiny gaps around the slab until it finds the easiest path upward.
Think of it like this: your plumbing is under pressure all day. When a pipe develops a crack—maybe from corrosion, shifting soil, or a bad fitting—it doesn’t politely drip into a bucket. It pushes water into places your home was never designed to handle, and that’s when water damage starts turning into structural problems.
How slab leaks form: the “slow sabotage” factors
Most homeowners expect a pipe to fail dramatically. In reality, slab leaks often start small: tiny pinholes in copper, a hairline split in a joint, or abrasion over years from sand and soil movement. If your neighborhood has expansive clay soil (the kind that swells when wet and shrinks when dry), your slab and the pipes beneath it can experience repeated micro-movements. Over time, those little shifts add up.
Water chemistry matters too. Slightly acidic or mineral-heavy water can accelerate corrosion in certain metals. Combine that with high pressure (common in many cities), and you’ve got a recipe for a hidden leak that worsens without warning. If your home has a pressure regulator (PRV) that’s old or misadjusted, the constant stress can literally shorten pipe life.
Why it matters beyond the bill: foundation and indoor air
Yes, the first punch is often financial: that “why is this bill $120 higher?” moment. But the bigger risk is what happens to the slab and surrounding soils. Constant water flow can wash out fine particles under the foundation. That can contribute to uneven settling, which is where foundation leak symptoms and structural shifts can show up.
Then there’s indoor air quality. Persistent moisture under flooring can fuel mold, especially under carpet, padding, or behind baseboards. If anyone in the home has asthma or allergies, that damp environment isn’t just annoying—it can become a health issue.
A quick real-life style scenario (because this is how it usually goes)
Picture “Sam and Priya,” a couple who bought a 1990s slab home. They noticed their hot water heater running a lot and assumed it was aging. Then Priya started loving one specific warm tile spot in the kitchen during winter—until it stayed warm in spring too. Their water bill climbed quietly for three months. By the time they called for a plumbing inspection, the leak had already softened the adhesive under nearby flooring.
The big takeaway: slab leaks don’t usually explode—they accumulate consequences. Next up, let’s talk about the warning signs that show up inside and outside your home.
Warning Signs of a Slab Leak: What to Look, Feel, and Smell For
If slab leaks were obvious, they wouldn’t be such a nightmare. The clues are real, but they’re often dismissed as “old house stuff” or seasonal humidity. The trick is to look for clusters of symptoms: two or three signals together are much more meaningful than one random oddity.
Indoor signs: floors, baseboards, and weird temperature zones
Start with your floors. Floor moisture can show up as darker carpet, damp rug edges, or baseboards that look stained or slightly swollen. Tile floors may loosen, grout may crack, or sections may feel hollow. Wood flooring can cup or warp because moisture changes how boards expand.
Temperature is another huge tell. If a hot-water line is leaking, you may feel a warm patch on tile, laminate, or even carpet. Some people find it by accident: bare feet in the morning, or a pet that suddenly loves one exact spot. If a cold-water line is leaking, you can still get cooler damp zones—especially if evaporation is happening near the surface.
Sound and pressure clues: the house “talks” when pipes fail
In a quiet house, do you hear faint hissing or a steady rushing sound even when no taps are on? That can indicate water moving through a break. Pair that with a water pressure drop—like shower flow that gets weaker when no one changed anything—and the suspicion becomes much stronger.
Be careful here: running toilets and dripping faucets can mimic a slab leak. That’s why you check the easy stuff first, then escalate your testing.
Outdoor/property signs: lawn clues that aren’t just “nice grass”
Outside, look for oddly lush patches of grass, muddy zones that don’t dry out, or soggy soil near the foundation line. Water will find routes along pipe trenches and utility corridors. In more severe cases, you might see small depressions or sinkhole-like dips where soil has been washed out.
If you’re seeing outdoor wetness plus indoor moisture clues, that’s when you stop assuming it’s “sprinkler overspray” and start treating it like a leak until proven otherwise.
Secondary signs people miss (until the damage is loud)
Musty smells that keep returning, recurring mildew in corners, and paint bubbling near baseboards can all be moisture symptoms. Another sneaky one: a water heater that seems to run all the time. A hot-water slab leak can force the heater to constantly reheat replacement water, which looks like “my heater is dying” when it’s actually the plumbing.
Now that you’ve got the warning sign checklist, let’s move into DIY confirmation tests that can save you time and sharpen the conversation with a professional plumber.
Want a visual walkthrough before you start touching valves? This kind of video search is useful to get familiar with what meters and indicators look like in real homes.
Quick DIY Home Leak Detection Tests: Meter Checks, Isolation Steps, and Simple Tools
DIY testing won’t replace a full plumbing inspection, but it can help you answer a critical question: “Is water being used when nobody is using water?” That’s the heart of home leak detection. The goal is not to become your own leak locator. The goal is to gather clean evidence, avoid false alarms, and act faster.
The water meter test (the fastest reality check)
Pick a time when the house is quiet. Turn off all fixtures and appliances that use water: faucets, dishwashers, washing machines, ice makers, humidifiers—everything. Then check your water meter. Many meters have a small leak indicator (often a triangle or tiny dial) that moves even with small flows.
If the indicator spins while everything is off, you’ve got a leak somewhere. That “somewhere” could be a toilet flapper, irrigation, or a slab leak. So do one more step: record the meter reading at night, don’t use water, and check again in the morning. Even a small change can mean consistent loss.
Rule-out checks: toilets, visible plumbing, and irrigation
Before you panic, knock out the usual suspects. Toilets are famous for silent leaks. A quick dye test (food coloring in the tank, wait 10 minutes) can confirm if water is slipping into the bowl. Also check under sinks, behind washing machines, and around water heater connections for drips.
If you have irrigation, shut it off for a day and retest the meter. Sprinkler valves can leak underground and mimic a slab leak pattern in your yard.
Hot vs. cold isolate thinking (without getting fancy)
Warm floor spots often point toward hot water lines. If you suspect hot-water leakage, note whether the warm area persists even when hot water hasn’t been used for hours. Some homeowners also notice the water heater cycling frequently. Those patterns matter when you talk to a professional plumber.
You can also compare fixture performance: if you’re seeing a widespread water pressure drop across the home, not just one faucet, that hints at a supply-side issue rather than a clogged aerator.
DIY “light” tools: infrared attachments and moisture meters
In 2026, it’s pretty common for homeowners to have phone-based infrared attachments or to rent a basic thermal camera. These can show temperature differences across floors. A moisture meter can help confirm elevated readings near baseboards or flooring transitions.
These tools don’t “prove” a slab leak on their own, but they can build a map of suspicious zones—exactly the kind of info that makes the next step faster and less destructive.
A practical checklist you can literally follow tonight
- 🧻 Check toilets for silent leaks (dye test if needed).
- 🚿 Confirm all fixtures are off and no appliances are running.
- 📍 Read the water meter and watch the leak indicator for 2–5 minutes.
- 📝 Record a nighttime meter reading; recheck in the morning.
- 👣 Walk the house: mark warm/damp patches and note any musty odor zones.
- 📸 Take photos and jot down dates/times for your records (insurance loves timelines).
Once you’ve got evidence, the next move is understanding what pros do differently—because their leak detection tools can pinpoint the exact spot and reduce the amount of concrete that gets opened up.
If you’re curious what infrared and acoustic locating looks like on a real jobsite, this kind of video search is a good primer before the technician arrives.
Professional Slab Leak Detection: What Technicians Do and Which Leak Detection Tools Actually Work
When a professional plumber shows up for slab leak diagnostics, the best outcome is simple: confirm the leak, pinpoint the area, and recommend a repair plan with the least disruption. The real win is avoiding “guess-and-break” repairs where someone jackhammers the wrong spot, patches it, then has to do it again three feet over.
Acoustic listening: hearing the leak’s “signature”
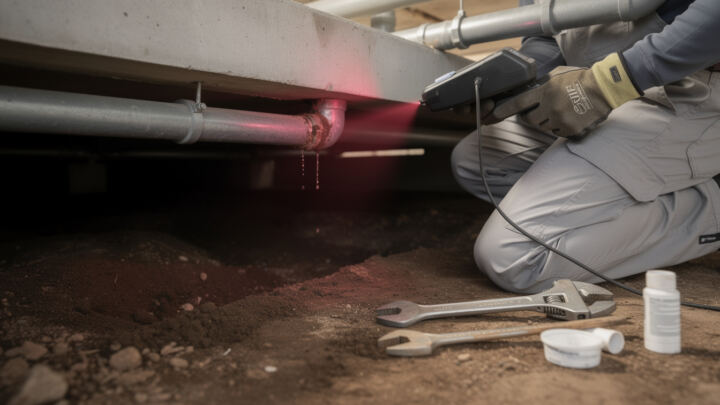
One common method uses acoustic sensors and correlators. Leaking pressurized water makes a distinct sound as it escapes. Technicians place sensors at strategic points and listen for pitch and intensity changes that help narrow the location.
This works best when background noise is low. That’s why pros may ask you to turn off HVAC fans or keep the house quiet for a bit. It can feel a little weird—someone walking around with headphones like they’re DJ-ing your kitchen—but it’s legit.
Pressure testing and isolation: proving the line is compromised
Pressure tests are the “math” of leak detection. A tech isolates sections of plumbing and pressurizes them to see whether the pressure holds. If it drops, there’s leakage in that section. This is especially useful when the home has multiple branches and the symptoms aren’t localized.
It’s also a key step before certain repairs. Nobody wants to repipe half a system only to learn the problem was on a different branch.
Infrared scanning, moisture mapping, and electronic tracing
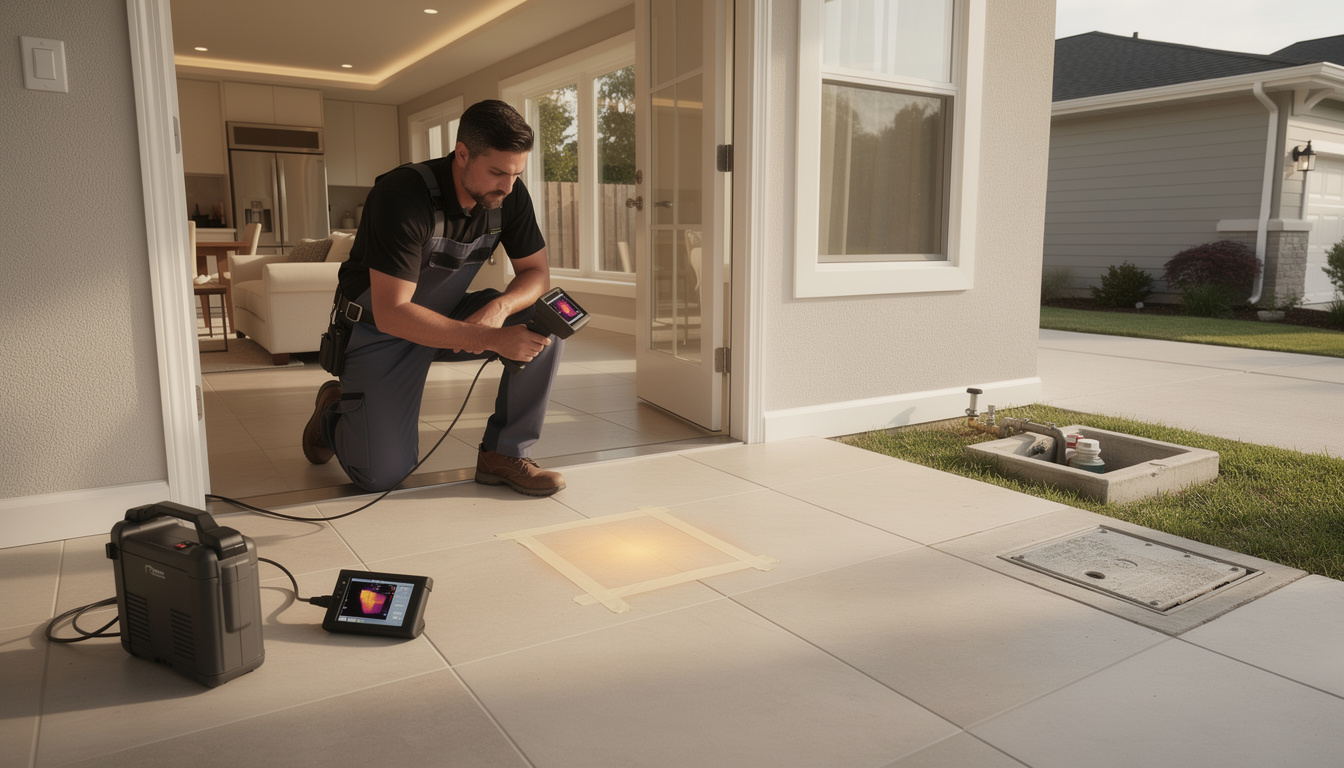
Thermal imaging can reveal temperature anomalies caused by leaking hot water lines and patterns created by evaporative cooling. Moisture mapping helps identify elevated moisture levels behind baseboards or in flooring transitions. Electronic tracing can help locate pipe routes so the team knows where not to cut.
Sometimes, especially in complex slabs with multiple utilities, technicians may recommend ground-penetrating radar to map out what’s embedded and reduce risk during access. Not every job needs it, but when it’s needed, it’s worth it.
What you should ask before anyone starts breaking concrete
- 🧾 “Will you provide a written locating report with photos/readings?”
- 📌 “How confident are you in the marked location—what’s the margin of error?”
- 🛠️ “If we open the slab, who handles restoration (flooring, tile, patch)?”
- ⏱️ “What’s the timeline from locating to completed pipe repair?”
- 💳 “Is pricing flat-rate or time-and-materials, and what triggers change orders?”
A comparison table: DIY vs. pro methods (and what each is good for)
| Method | Best for | What you’ll notice | Limitations |
|---|---|---|---|
| 🏠 DIY meter test | Confirming “water is moving” with everything off | Leak indicator spins / usage increases overnight | Doesn’t pinpoint location; toilets/irrigation can mimic results |
| 🌡️ DIY moisture meter / infrared | Spotting suspicious floor moisture patterns | Hot/cool patches; higher readings near baseboards | Can confuse condensation with active leakage |
| 🎧 Acoustic correlation (pro) | Narrowing a leak zone under a slab | Tech moves sensor points and “tracks” sound | Noisy environments reduce accuracy |
| 📉 Pressure test (pro) | Proving which line is failing | Gauges set up; pressure drop confirms leak | Still needs locating to minimize demolition |
| 🛰️ Advanced locating (pro: tracing/radar) | Complex slabs with multiple utilities | Marked routes; fewer “surprise” cuts | Higher diagnostic cost, but often saves on repairs |
Once the leak is located, it’s time to shift from “Where is it?” to “How do we stop it safely today, and fix it properly next?” That’s the bridge into immediate safety steps and repair choices.
Fixing Slab Leaks: Safety Steps, Repair Options, Cost Drivers, and a Clean Plan Forward
A slab leak repair is one of those home projects where going “full DIY hero” can backfire fast. Water plus electrical systems plus concrete work is a bad combo. The smart play is to stabilize the situation, prevent extra water damage, and choose the repair approach that won’t set you up for repeat failures.
Immediate safety steps (do this before you worry about anything else)
First: if you smell gas, leave the home and call the utility/emergency line. Don’t flip switches. Don’t light anything. Water-related slab leaks are common, but safety rules don’t care what you “think” it is.
If it’s clearly a water issue and you can safely access the shutoff, close the main water valve. Keep kids and pets away from wet areas. If water is near outlets or appliances, shut power off at the main breaker only if you can do it from a dry, safe position.
Temporary containment (not a fix, just damage control)
Use towels, buckets, and plastic sheeting to limit spread. Ventilate with open windows, and run fans/dehumidifiers if it’s safe. The goal is to slow mold growth and protect finishes while you schedule the proper pipe repair.
Also: take photos, write down dates, and save receipts. That paper trail often decides whether insurance treats your claim as a sudden incident or “long-term seepage.”
Main repair options: spot repair, reroute/repiping, trenchless solutions
Spot repair is the classic approach: open the slab at the leak location, cut out the failed pipe section, replace it, then patch the concrete. It’s often cost-effective when there’s one isolated failure and the pipe material is otherwise in good shape.
Rerouting (sometimes called “repipe above the slab”) avoids breaking the slab extensively by running new lines through walls or ceilings and abandoning the old under-slab section. This can be a great option if your plumbing has multiple weak points or if the slab access would destroy expensive finishes.
Trenchless methods like epoxy lining or pipe bursting can reduce demolition, especially for certain pipe types and layouts. The upfront price can be higher, but the reduced restoration work (tile, flooring, cabinetry) can make it competitive overall. The key is matching the method to pipe material, diameter, and the nature of the damage.
Cost drivers (why two “similar” jobs can price out wildly differently)
Repair cost is rarely just “fix pipe.” It’s detection + access + repair + restoration. A leak in bare concrete is very different from a leak under designer tile or hardwood. Labor rates vary by region, and permits can be required for certain repipes or reroutes.
In many U.S. markets, basic slab leak locating can be priced separately, and full repairs commonly land in the low-to-mid thousands once you include restoration. If someone gives you a suspiciously cheap number without asking about flooring, access, and pipe material, that’s not a “deal”—that’s a future change order.
Insurance and who pays: how to avoid getting blindsided
Homeowners insurance often covers sudden water events and resulting damage (like flooring replacement), but it frequently excludes gradual leakage, wear-and-tear, or maintenance-related deterioration. Some policies cover access to reach the pipe; others cover only the damage caused by the leak, not the plumbing itself.
The best move is to file early, document thoroughly, and ask your adjuster specifically what’s covered: detection, demolition/access, pipe replacement, and restoration. If you have a warranty on repipe work or a home warranty plan, check those terms too—just don’t delay emergency mitigation while you hunt for paperwork.
Ending this the smart way: prevention so you don’t do this again
Once repaired, prevention isn’t complicated—it’s just consistency. Keep water pressure in a safe range with a working PRV, get periodic plumbing checkups, and consider smart shutoff valves and moisture sensors near risk zones. Good drainage and gutter routing matter too, because water around the slab increases soil movement and stress.
Handled early, a slab leak can be a “two-week headache.” Ignored, it can become a years-long home value problem—so the real flex is acting while it’s still manageable.
How do I know it’s a slab leak and not just a running toilet?
Start with rule-outs: do a toilet dye test, check visible fixture supply lines, and shut off irrigation for a day. Then run a water meter test when everything is off. If the meter still shows flow and you can’t find a fixture leak, a slab leak becomes much more likely and you should schedule a plumbing inspection.
What’s the first thing I should do when I suspect a slab leak?
Shut off the main water valve if you can do it safely, and keep people away from wet areas near electricity. Take photos and notes for insurance. Then call a professional plumber who has slab-leak locating experience and leak detection tools to confirm the location before any concrete is opened.
Can a slab leak cause foundation cracks or a foundation leak problem?
Yes. Ongoing water under the slab can shift or wash out supporting soils, contributing to movement that shows up as cracks, uneven floors, or doors that don’t close right. While not every crack means a slab leak, the combo of cracks plus floor moisture or a bill spike is a strong warning sign.
Is trenchless repair always better than breaking the slab?
Not always. Trenchless options can reduce demolition and restoration, but they depend on pipe type, diameter, and the kind of failure. Sometimes a targeted spot repair is the cleanest solution; other times a reroute/repiping plan prevents repeat leaks. A good contractor will explain the trade-offs and show you why one method fits your situation.
Will fixing a slab leak improve water pressure right away?
If the leak was causing a water pressure drop across the house, repairs often restore normal pressure immediately. If pressure still feels low afterward, it could be a separate issue like a failing pressure regulator, mineral buildup, or a partially closed valve—worth checking during the final walkthrough.